Pleasanterのアプリ連携
Pleasanterのシングルサインオン設定の最新情報は、プリザンターでSAML認証を利用するを参照してください。
シングルサインオン
SingleIDのアプリ連携設定
- SingleID 管理者ポータル>アプリ連携>アプリ一覧画面へ移動します。
-
カタログ表示ボタンをクリックします。

-
アプリカタログが表示されるので、Pleasanterの登録ボタンをクリックします。
-
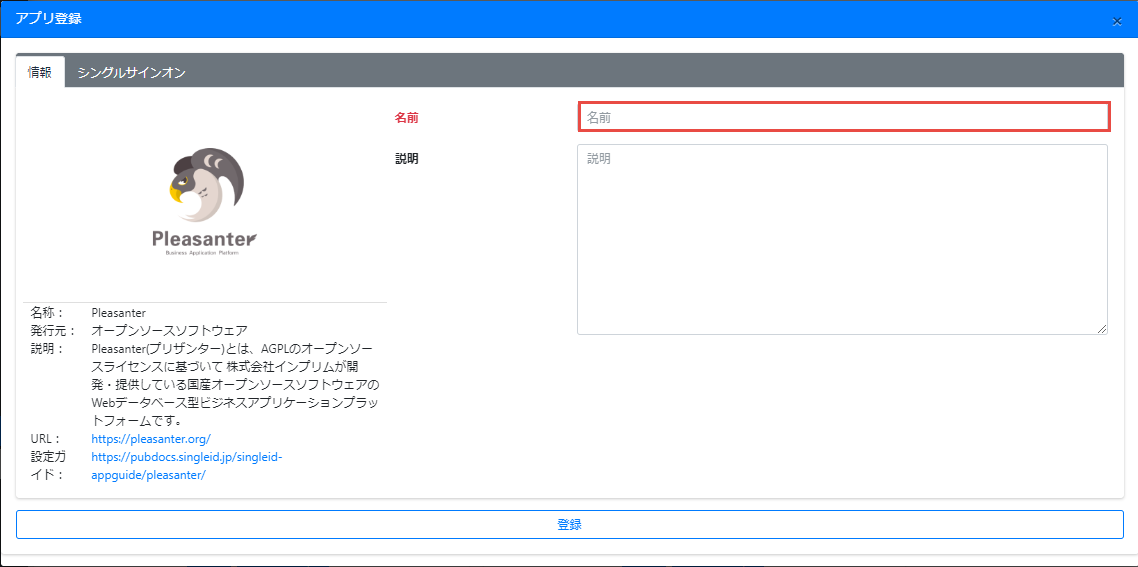
アプリ登録画面がポップアップします。情報タブの名前に、アプリを識別できるような名前を、半角小文字の英数字、-(ハイフン)、_(アンダースコア)で設定します。
-
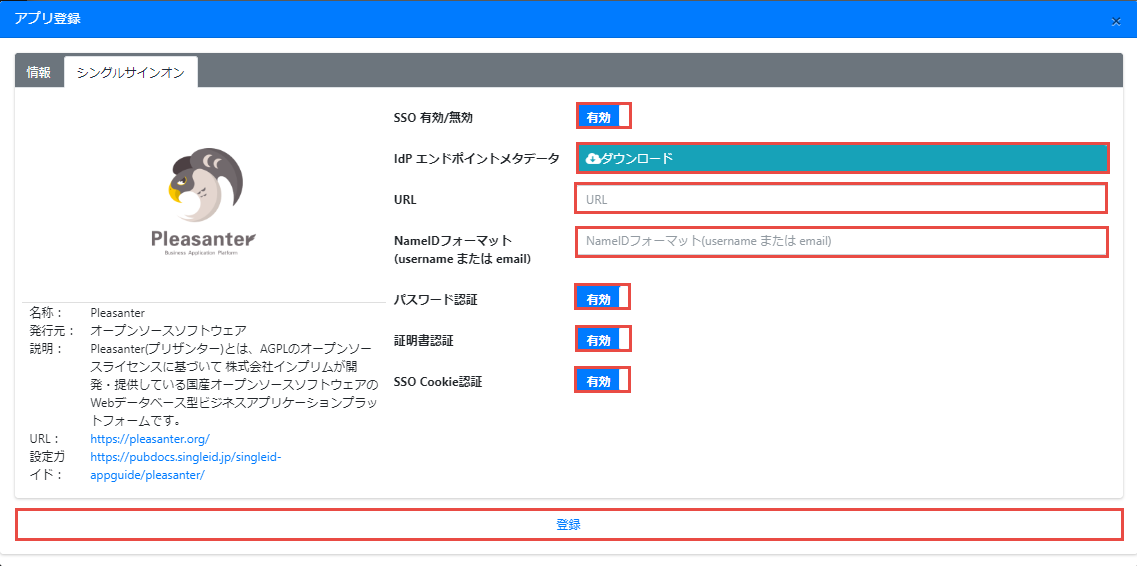
シングルサインオンタブに移動します。
-
SSO 有効/無効を有効に設定します。
- IdP エンドポイントメタデータのダウンロードボタンをクリックし、メタデータを取得します。このメタデータは、Pleasanterの設定を行うときに必要となります。
- URLに、PleasanterのURLを設定します。(例:https://pleasanter.example.com/pleasanter/)
- NameIDフォーマットに、SAML NameIDフォーマットを指定します。SingleIDユーザのユーザ名でログインする場合には、usernameを入力し、SingleIDユーザのメールアドレスでログインする場合には、emailを入力します。
-
登録ボタンをクリックして、アプリを登録します。
PleasanterのSAML認証設定
Pleasanterのサーバで作業を行います。
- SingleIDの公開鍵証明書をインポートします。SingleIDのIdPエンドポイントメタデータのファイルを開きます。
<ds:X509Certificate>タグ内のMIIで始まる文字列(例:MIICnzCCAYcCBgF/zubcKTANBgkqhkiG9w0BAQsFADATMREwDwYDVQQDDAg3MDAwMDA4MTA……..)をコピーして、テキストファイル(テキストファイルの拡張子はcrt)として保存します。 - 保存したファイルをダブルクリックします。証明書ウィンドウが表示されます。
- 証明書をインストールボタンをクリックし、保存場所をローカルコンピューター、証明書ストアを個人として、証明書をインストールします。
-
Authentication.json(標準構成で、
C:¥web¥pleasanter¥Implem.Pleasanter¥App_Data¥Parametersディレクトリに配置されています。)を編集します。 -
以下の内容で設定します。
Pleasanterの設定項目 設定内容 Provider SAML SamlTenantId 1 SPOptions EntityId SingleIDのアプリ連携設定の手順8で入力したURLの後ろに、Saml2の文字列を付加します。 ReturnUrl SingleIDのアプリ連携設定の手順8で入力したURLの後ろに、Users/SamlLoginの文字列を付加します。 AuthenticateRequestSigningBehavior IfIdpWantAuthnRequestsSigned OutboundSigningAlgorithm http://www.w3.org/2001/04/xmldsig-more#rsa-sha256 MinIncomingSigningAlgorithm http://www.w3.org/2001/04/xmldsig-more#rsa-sha256 DisableOverwriteName true IgnoreMissingInResponseTo false PublicOrigin null ServiceCertificates [] IdentityProviders EntityId SingleIDのIdPエンドポイントメタデータのファイルを開きます。 <md:EntityDescriptor entityID=から始まる行のURLを入力します。
(例:https://auth-02-0001.poc.singleid.jp/auth/realms/90000013)SignOnUrl SingleIDのIdPエンドポイントメタデータのファイルを開きます。 <md:SingleSignOnService Binding="urn:oasis:names:tc:SAML:2.0:bindings:HTTP-POST" Location=から始まる行のURLを入力します。
(例:https://auth-02-0001.poc.singleid.jp/auth/realms/90000013/protocol/saml)LogoutUrl null AllowUnsolicitedAuthnResponse true Binding HttpPost WantAuthnRequestsSigned false DisableOutboundLogoutRequests true LoadMetadata false MetadataLocation null SigningCertificate StoreName My StoreLocation LocalMachine X509FindType FindByThumbprint FindValue 証明書の検索値(拇印)は以下の手順で確認できます。
1. [Windows]キー+[R]を押下し、ファイル名を指定して実行ダイアログに「certlm.msc」を入力して「OK」
2. 管理コンソールの「個人」-「証明書」から対象の証明書をダブルクリック(または右クリックで「開く」)
3. 証明書情報画面の「詳細」タブ-「拇印」フィールドの「値」に表示される文字列Authentication.json 設定例(SAML認証に関連する項目のみ抜粋{ "Provider": "SAML", // ~中略~ "SamlParameters": { "Attributes": { "Name": "Name", "UserCode": "UserCode", "Birthday": "Birthday", "Gender": "Gender", "Language": "Language", "TimeZone": "TimeZone", "TenantManager": "TenantManager", "DeptCode": "DeptCode", "Dept": "Dept", "Body": "Body", "MailAddress": "{NameId}" }, "SamlTenantId": 1, "SPOptions": { "EntityId": "https://pleasanter.example.com/pleasanter/Saml2", "ReturnUrl": "https://pleasanter.example.com/pleasanter/Users/SamlLogin", "AuthenticateRequestSigningBehavior": "IfIdpWantAuthnRequestsSigned", "OutboundSigningAlgorithm": "http://www.w3.org/2001/04/xmldsig-more#rsa-sha256", "MinIncomingSigningAlgorithm": "http://www.w3.org/2001/04/xmldsig-more#rsa-sha256", "DisableOverwriteName": true, "IgnoreMissingInResponseTo": false, "PublicOrigin": null, "ServiceCertificates": [] }, "IdentityProviders": [ { "EntityId": "https://auth-02-0001.poc.singleid.jp/auth/realms/90000013", "SignOnUrl": "https://auth-02-0001.poc.singleid.jp/auth/realms/90000013/protocol/saml", "LogoutUrl": null, "AllowUnsolicitedAuthnResponse": true, "Binding": "HttpPost", "WantAuthnRequestsSigned": false, "DisableOutboundLogoutRequests": true, "LoadMetadata": false, "MetadataLocation": null, "SigningCertificate": { "StoreName": "My", "StoreLocation": "LocalMachine", "X509FindType": "FindByThumbprint", "FindValue": "50B459426DE554010B35E9XXXXXXXXXXXXXXXXX" } } ] } } -
IISを再起動します。
プロビジョニング
SingleIDからPleasanterへのユーザおよびグループのプロビジョニングには、対応しておりません。
SingleIDおよびPleasanterの両方に存在するユーザのみが、シングルサインオン可能です。同一のユーザおよびグループをSingleIDおよびPleasanterへ登録してください。
アプリにユーザ追加
- SingleID 管理者ポータル>アプリ連携>アプリ一覧画面へ移動します。
- 登録したアプリの列にあるチェックボックスを選択します。
-
ユーザ追加ボタンをクリックします。

-
ユーザ追加画面がポップアップします。アプリへ追加したいユーザ名を選択し、登録ボタンをクリックして、アプリへユーザを追加します。

動作確認
- Pleasanterのログイン画面へアクセスします。
- ログイン画面にあるSSOログインボタンをクリックします。
-
SingleIDのログイン画面が表示されます。すでに、SingleIDへログイン中であれば、ログイン画面は表示されず、Pleasanterへログインできます。
